Did you know that you can access Microsoft Outlook via Rulex Platform?
Rulex Platform allows you to access the content of a Microsoft Outlook account by connecting to Microsoft Graph APIs. This means that you can import the attachments of an Outlook email directly into Rulex Platform, and this allows you to save up time and streamline your working process.
Just follow these simple steps to register your Microsoft Graph APIs and connect MS Outlook to Rulex Platform:
Prerequisites
To call Microsoft Graph, an Azure application must obtain an access token from the Microsoft identity platform.
This access token includes information about whether the app is authorized to access Microsoft Graph on behalf of a signed-in user or with its own identity or not. Since the access token validity is short-lived, the identity platform gives also a refresh token, which can be later used to get a new access token without manual intervention.
For security reasons, Rulex Platform allows logging in to Outlook on behalf of a user, meaning that a user should sign in to the program and personally grant access to their data. This is also known as delegate access.
In order to call Microsoft Graph APIs, an Azure application needs to be created and registered with the Microsoft identity platform.
Procedure
- Open the Office 365 Admin Center using the account of a user member of the Tenant Global Admins group.
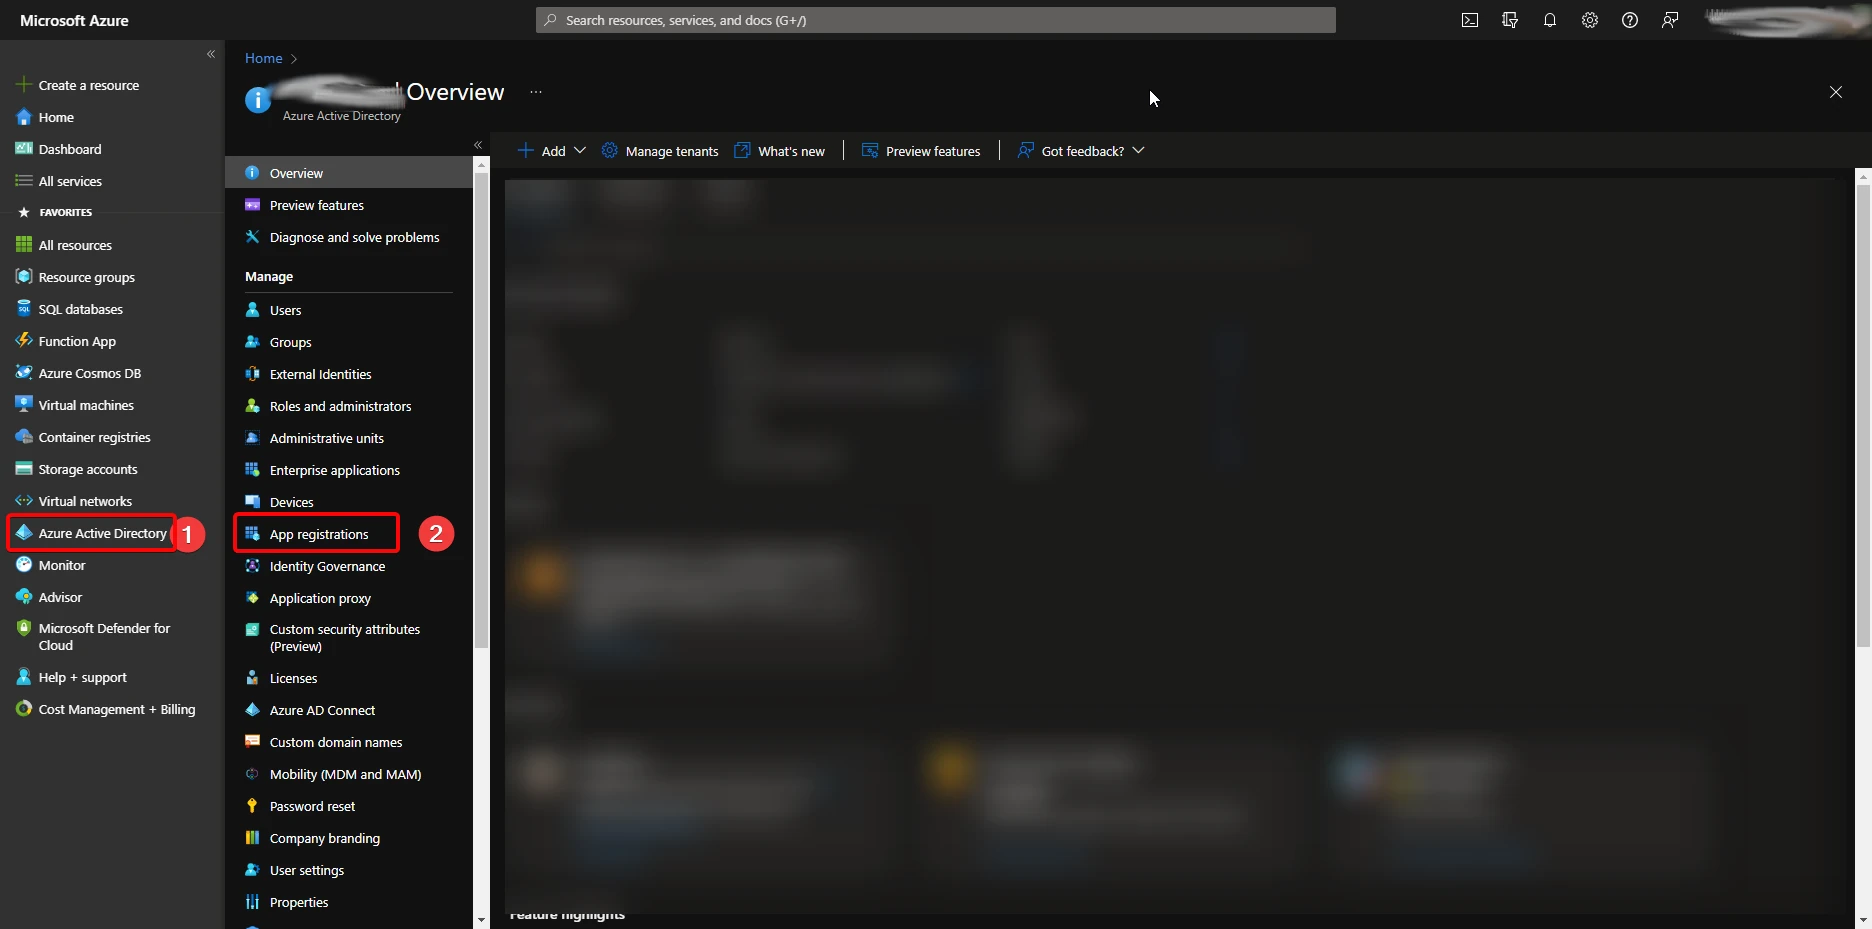
- Click on the Azure Active Directory (soon to be renamed into Microsoft Entra ID) link that is available under the Admin centers group in the left-side tree view of the Office 365 Admin Center. In the new browser tab that will be opened, you will find the Microsoft Azure portal.
- Select the Azure Active Directory section n the newly opened portal, and choose the option App registrations.
- In the App registrations tab, you will find the list of Azure AD applications registered in your tenant. Click the New registration button in the upper left part of the blade.
- Provide a name for your application and click on Register at the bottom of the blade. Now that the application is registered, it then has to grant the API permissions related to Outlook.
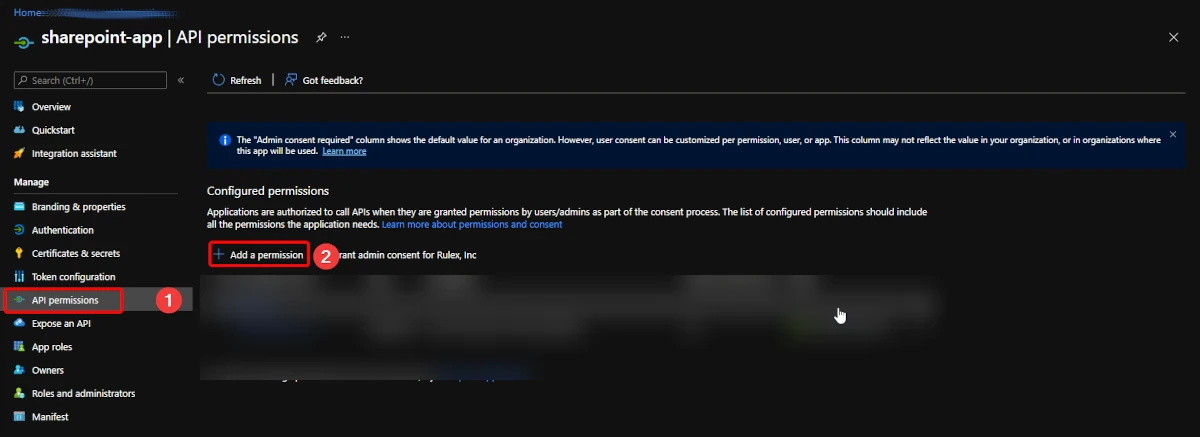
- Since Rulex Platform supports delegated access, only delegated permissions will be allowed. In particular, the necessary permissions, also called scopes, are:


- User.Read - Sign in and read user profile.
- Mail.Read - Read user mail.
- Mail.ReadWrite - Read and write access to user mail (useful only for export connections).
- Mail.Send - Send mail as a user (useful only for export connections).
Parameters to interact with Rulex Platform
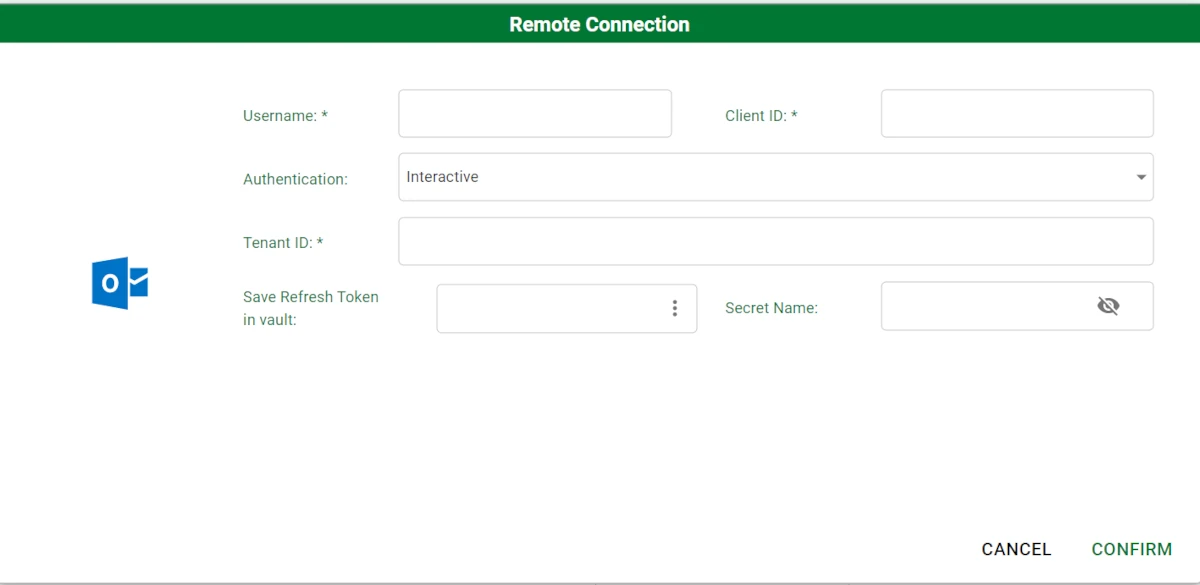
As the application is registered and ready to interact with Rulex Platform, to configure the Outlook panel in Rulex Platform specify the following parameters:
- Username: the mail address whose messages need to be read.
- Client ID: the ID specific to the application (also known as application ID).
- Authentication: the authentication type. Possible values are:
- Interactive: users have to manually enter their mail address and password in a popup window. These credentials are used to automatically get a new pair of access token and refresh token.
- Refresh Token: users enter a valid refresh token to get a new access token.
- Tenant ID: the tenant ID of the users’ Azure subscription.

If the chosen authentication type is Interactive, it will be possible to save the refresh token for later use as a secret in an Rulex Platform vault.
- Save Refresh Token in vault: a Rulex Platform vault resource.
- Secret Name: the name of the secret that will contain the new refresh token.
Use then a vault variable to retrieve it and to use it for example later in a Refresh Token authentication connection type.
-
 2
2


0 Comments
Recommended Comments
There are no comments to display.